Application Management
supOS supports service routing based on Konga, and you can add your application to supOS for integrated entry. Following certain rules, you can:
- Set the routing path to your backend service.
- Fashion access authorization mechanisms.
- Add external service to supOS frontend as one of the applications.
Creating Service
- Select System > RoutingManagement, and then click SERVICES.
tip
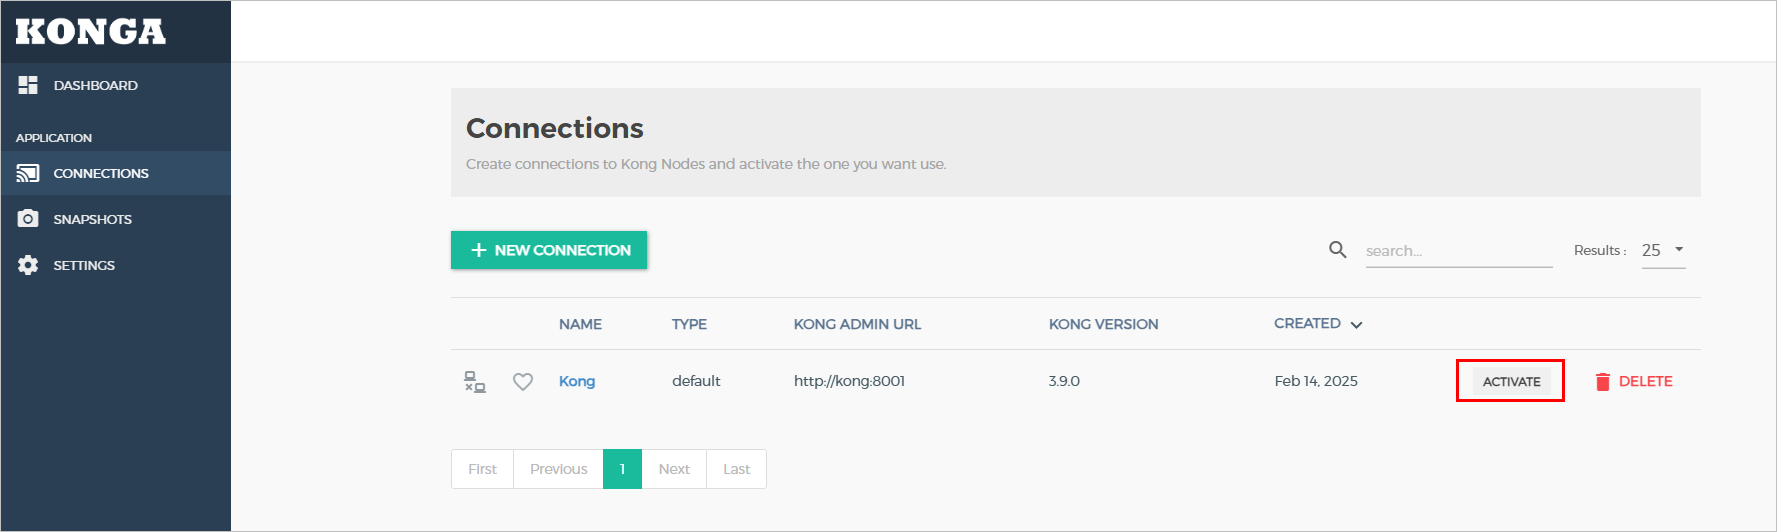
If the DASHBOARD shows no active connection, go to CONNECTIONS, and then click ACTIVATE next to Kong.
- Click ADD NEW SERVICE, and then enter the information of your backend service.
info
These parameters are necessary. For instance, you have a backend resource https://example.com:8080.
- Protocol: https
- Host: example.com
- Port: 8080
- Path: Request path prefix, which will added to the path of request from client before the request gets forwarded to your service.

- Click SUBMIT SERVICE.
Building Routes
Build the routing path for accessing the service.
- On the Service Details page, click Routes.
- Click ADD ROUTE, and then enter the information of the route to access your service.
- Tags: We have mapped some tags with fixed meanings.
| Tag | Description |
|---|---|
| menu | The service will appear as an application on supOS homepage. |
| parentName:menu.tag.xxx | xxx is the name of an existing first-level menu in supOS (all in lowercase). It indicates that the current route appears as a second-level menu of xxx. |
| homeParentName:menu.tag.xxx | xxx is the name of an existing first-level menu in supOS (all in lowercase). It indicates that the current route appears in the navigation bar and serves as a second-level menu of xxx. |
| description:menu.desc.xxx | xxx is the name of the route. It represents the description information corresponding to xxx. |
- Paths: Request paths that will be recognized by Kong and Kong will match and forward the request to your service.
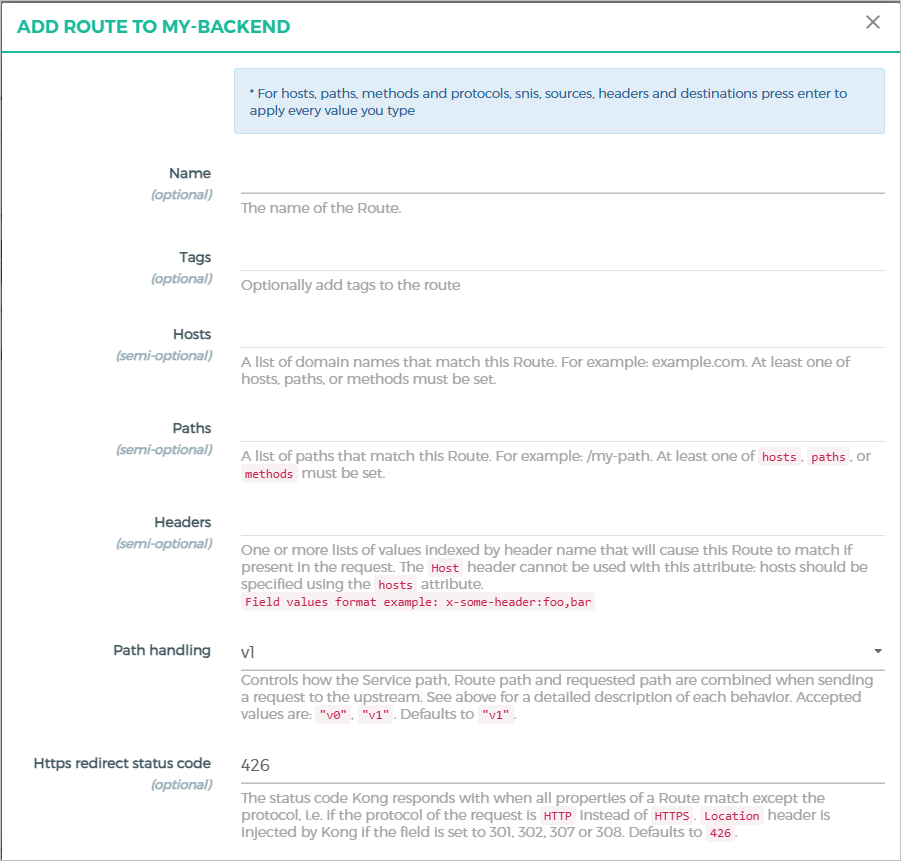
- Click SUBMIT ROUTE.
Setting Authentication
Set authentication mechanisms for your service.
- On the Service Details page, click Plugins.
- Click ADD PLUGIN, and select Key Auth.
note
You can add other authentication methods. For more details, see Konga.
- Enter the Key names and decide how the anthentication information should be transmitted.
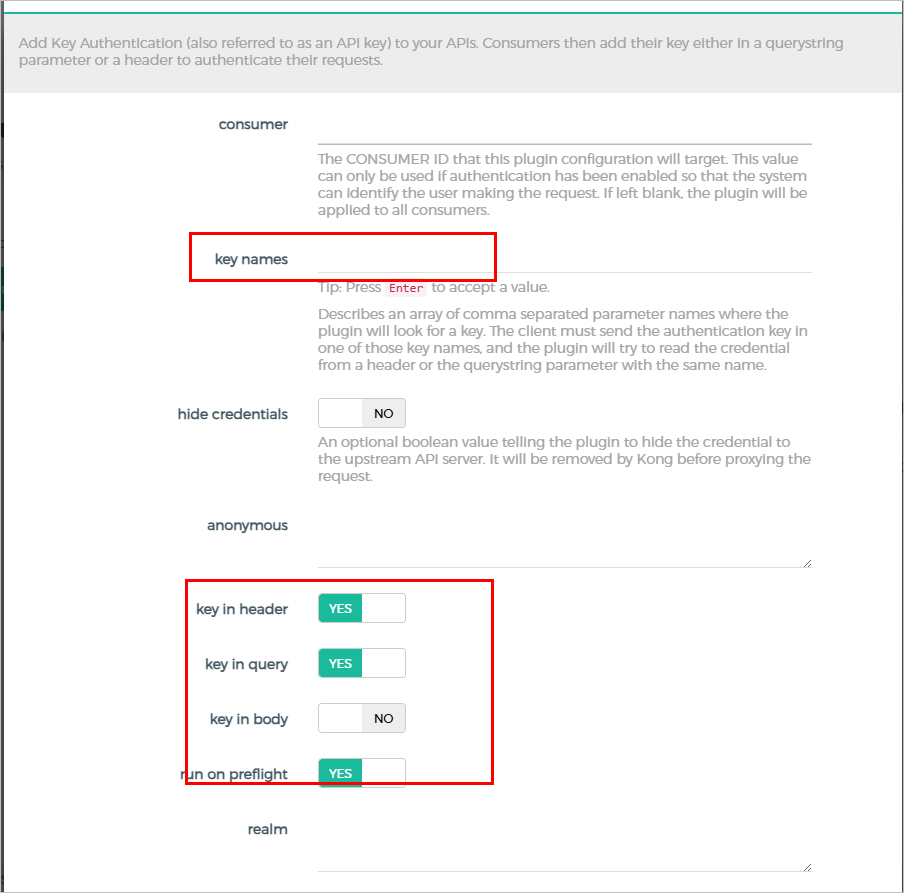
- Click ADD PLUGIN.
- Click CONSUMERS on the left side menu to add an authentication key.
- Click CREATE CONSUMER, and give it a username or ID.
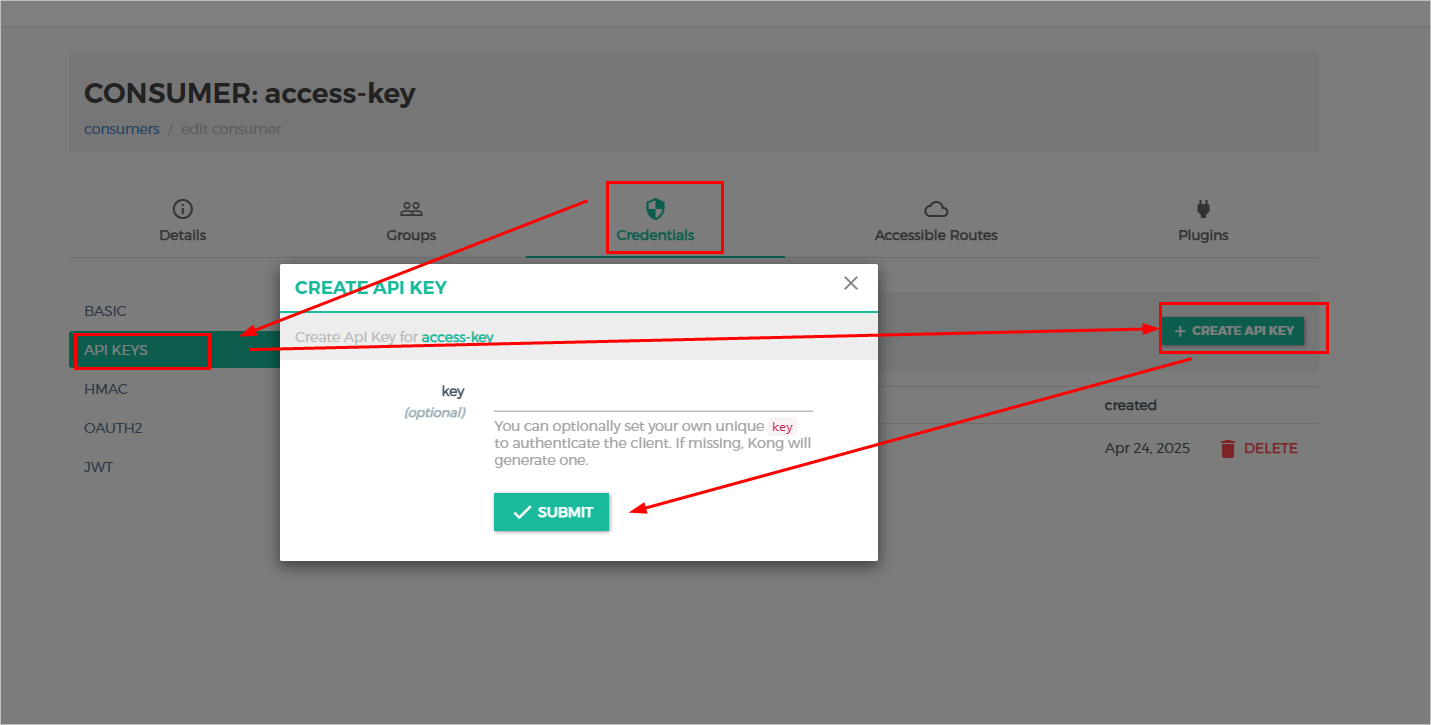
- On the details page, select Credentials.
- Select API KEYS, and then create an API key.
- Leave it empty and click SUBMIT, Konga will generate a custom key, which is necessary when accessing your service.